I spent quite a while drawing out the parts on the computer and made templates for the four walls in 2mm cardboard and then four walls in the plastikard to match. Unfortunately I managed to get the sizing wrong when going from the shell to the outer layer. Having cut out all 8 parts it was clear that they wouldn't go together, but it was also clear that the 2mm cardboard was too think for the wall depth I wanted, given the door and window parts I had to hand (these are from the PECO building components pack, part number LK-78). Rather than trying to redraw the cardboard shell I decided, given it was only a small test building, to just use the plastikard without any reinforcement. So I set about joining the walls together using plastic weld from E.M.A. Model Supplies.
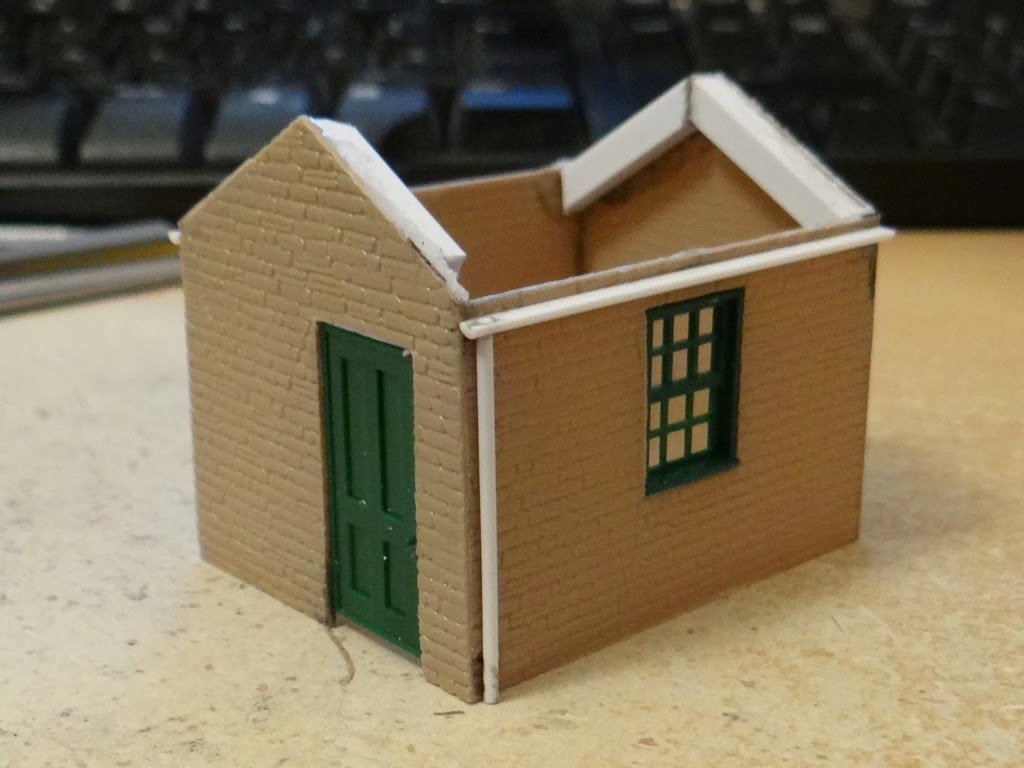
The rest of the bits you can see are all more sections of plastruct. There are some 4mm square sections used as roof girders to thicken the side walls and give me somewhere to attach the roof. The gutter is 2mm half round and the drain pipe is 1.3mm rod; I drilled a hole in the half round and slotted the rod in to make a nice solid joint.
The next step is to sort the roof. I'm going to experiment with adding separate roof tiles so it might take a while, even though it is only a small roof. Once that's done it will be on to painting, which will hopefully hide some of the more cowboy builder aspects. For a first attempt it's ... well if I'm being honest fairly terrible. Terrible it may be but at least I'm learning things that will be useful for the next attempt.
Well it may look terrible to you but......
ReplyDeleteMark, may I suggest you get some longitudinal bracing behind the longer walls? Plastikard is the very devil for warping and often well down the line. Also very difficult to blend mortar courses round corners on coursed stone, but a quick whip round the corners lightly with a triangular Swiss file should make a big difference to the continuity of the appearance. Nuttn' wrong with this wee hut and a great start to making stuff.
ReplyDeleteThanks. Looking at it now it's already slightly warped along the longer walls. I might add some bracing although at the moment I'm expecting this to be a throw away experiment to figure out a few different things. For example, a triangular file sounds perfect. I filed the edge down and then used a scalpel to try and put the mortar courses back in but that didn't exactly do much so I'll give the file idea a go. For larger buildings I'm think stone quoins would be a good way of avoiding the problem.
DeleteYes, it is looking really fine and I can see you are having lots of fun. Martin is right about the bracing, styrene does have some nasty tricks up it's sleeve. I have to use an extractor and a mask when I use styrene as over the years I have developed a sensitivity to the solvent, so yes, please use in a ventilated area. It's all very encouraging, this!
ReplyDeleteWhat amazes me about the plastic weld stuff is that it doesn't smell particularly bad, but you certainly know you are using it if you don't make sure the room is well ventilated!
DeleteA triangular file is my most used file...so versatile. As you probably know, Ratio make some nice quoins, I have too many so if you need a few just let me know.
ReplyDeleteWell a couple of minutes with a triangular file and the corners look much better. Still not brilliant but I think they will look reasonable once painted.
DeleteI didn't know, although I should have guessed, that Ratio made quoins. I new there are some superquick paper versions but they wouldn't have been much help. I thought I'd have to resort to making my own, but at least I can avoid that and know I'll have proper square corners!
Looks good. I believe there is an argument for always using an odd number of laminations. Putting a fillet behind wall joints can give you more freedom to reinstate mortar courses. IIRC the Howard Scenics card brickwork included specific sections to form corners,.
ReplyDeleteGlad to help Mark. My default file when I'm doing brass work is a saw file. Triangular AND double ended it gives me 6 goes at a job before I have to clean it out.
ReplyDeleteYou can get diamond dust needle files for a fiver a set from Lidl's and Aldi's. They are fine for plastics and, having no "cut" will never go off at a tangent, which normal toothed Swiss needles can do. I think stone quoins on such a structure might be a bit OTT, but it would be perfect for experimenting on.
How I miss Howard Scenic's brick paper, the very best you could buy. Why would they NOT still make it!? But correct bonding of plastic brick sheet can be achieved with a little filler and some rescribing. I did it on a motorbike shop building I made, corners, windows and doors and it didn't take too long.