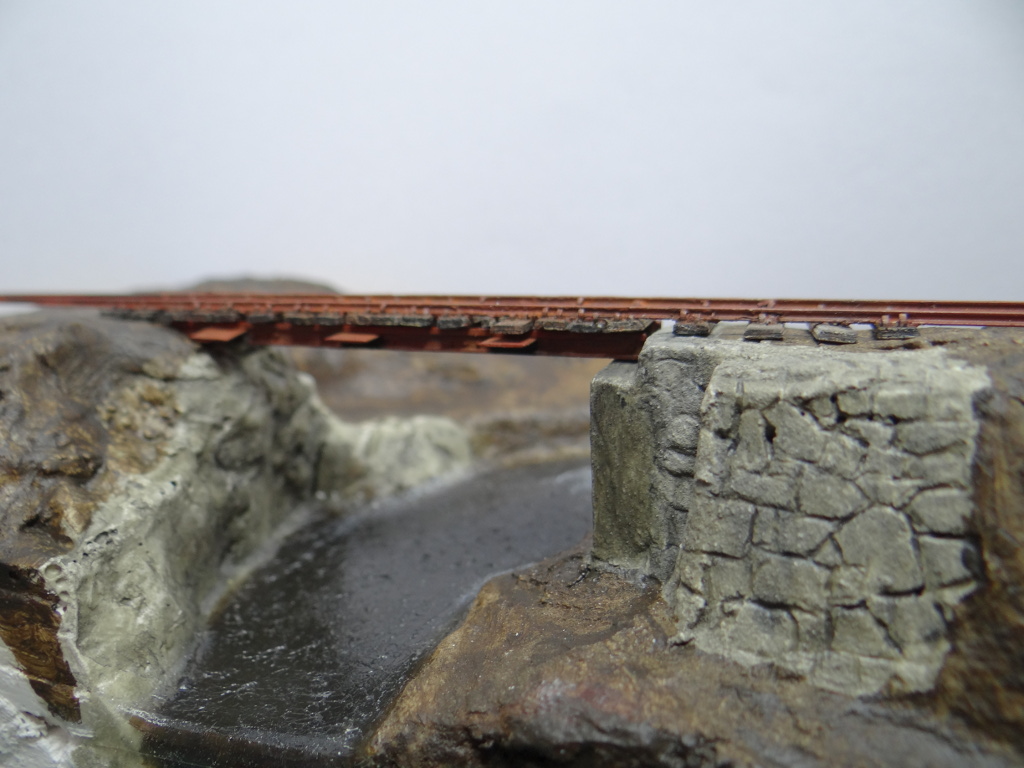
Having worked on my bridge model for about four months the good news is that my careful packing meant that it arrived safely at ExpoNG on Saturday along with eight other entries in a variety of scales.
The winner was "The Cutting" by Derek Harris. As you can see in the photo above the presentation was very clever as it forced you to look down on the model, just as you would if peering over a wall to look down into a cutting. I'm not going to comment on any of the models more than that as after one conversation on Saturday I found that even positive comments could be easily misunderstood given I had a model in the competition.
Given that I held off on showing the completed diorama before Saturday here it is in all its glory along with a label and more importantly my first exhibition badge (these are handed out at most exhibitions to each layout on show).
Usually people stick the exhibition badges to the layout display board but as I don't have one for the bridge, and it's unlikely to be displayed at any other exhibition in the future I'll just carefully store the badge away with the model.
I had a lot of fun building the bridge and I've improved my modelling skills no end, so regardless of the competition result, I'm calling this a win. Now I just have to wait and see what next years challenge will be and if it similarly captures my imagination.
Showing posts with label Dave Brewer Memorial Challenge. Show all posts
Monday, November 2, 2015
Monday, October 26, 2015
Signs of Life
Now I know I said I wouldn't post any more photos of the diorama until after the next Saturday, but that doesn't stop me showing you another small detailing piece I put together yesterday.
The railway line that this bridge forms part of was originally built across Duchal Moor to take people out to the shooting butts and was locally known as the Grouse Line. Given it's history it would seem that if I wanted to add any wildlife to the model, it should be a grouse. Unfortunately while I looked high and low for a model I could buy I couldn't find anything. The solution, as with pretty much all of the diorama, was to make one from scratch. To make it obvious what the bird is supposed to be I opted to model a black grouse with it's distinctive red wattles over the eyes.
In theory I had an easy to follow plan. Make an outline from fine wire, fill out the outline, and then paint. The first step was easy. I found a nice drawing online which I then scaled down to the right size to use as a template. I then taped a piece of 0.15 mm silver plated wire onto the drawing starting at the legs, before slowly bending it to match as close as I could the drawing. With the two ends together at the feet I twisted the wires together to give me something to use to fix it into the diorama.
Filling out the outline was harder though. My first attempt was to try and use solder to provide the body, but I couldn't get this to work well. Next up was some DAS clay, but I couldn't get it to stick to the wire very well in the small amounts I needed. My next thought was some plastic putty but on inspection my tube had dried up. I was about to give up at this point when I realised that the Woodland Scenics water effects gel is quite easy to shape and it holds the shape you put it in quite well. So a small amount was decanted onto scrap card and then a pin used to pick up small amounts to add to the body until I was happy with the shape. This was then left to dry out.
Once dry I sprayed on some grey primer to give the acrylic paints something to stick to, before painting the model with RailMatch weathered black which has a blue tint to it which matches the way feathers look quite well. The red wattle was then carefully picked on before the whole lot was sealed with a waft of satin varnish.
I'm pretty happy with the result, and in real life it looks better than the photo, mostly as it's only 7mm from beak to tail! Now I just have to decide where on the diorama to hide it to give anyone visiting ExpoNG something to look for.
The railway line that this bridge forms part of was originally built across Duchal Moor to take people out to the shooting butts and was locally known as the Grouse Line. Given it's history it would seem that if I wanted to add any wildlife to the model, it should be a grouse. Unfortunately while I looked high and low for a model I could buy I couldn't find anything. The solution, as with pretty much all of the diorama, was to make one from scratch. To make it obvious what the bird is supposed to be I opted to model a black grouse with it's distinctive red wattles over the eyes.
In theory I had an easy to follow plan. Make an outline from fine wire, fill out the outline, and then paint. The first step was easy. I found a nice drawing online which I then scaled down to the right size to use as a template. I then taped a piece of 0.15 mm silver plated wire onto the drawing starting at the legs, before slowly bending it to match as close as I could the drawing. With the two ends together at the feet I twisted the wires together to give me something to use to fix it into the diorama.
Filling out the outline was harder though. My first attempt was to try and use solder to provide the body, but I couldn't get this to work well. Next up was some DAS clay, but I couldn't get it to stick to the wire very well in the small amounts I needed. My next thought was some plastic putty but on inspection my tube had dried up. I was about to give up at this point when I realised that the Woodland Scenics water effects gel is quite easy to shape and it holds the shape you put it in quite well. So a small amount was decanted onto scrap card and then a pin used to pick up small amounts to add to the body until I was happy with the shape. This was then left to dry out.
Once dry I sprayed on some grey primer to give the acrylic paints something to stick to, before painting the model with RailMatch weathered black which has a blue tint to it which matches the way feathers look quite well. The red wattle was then carefully picked on before the whole lot was sealed with a waft of satin varnish.
I'm pretty happy with the result, and in real life it looks better than the photo, mostly as it's only 7mm from beak to tail! Now I just have to decide where on the diorama to hide it to give anyone visiting ExpoNG something to look for.
Sunday, October 25, 2015
The Heather Has Now Flowered
Having come up with a second way of producing the heather flowers I've now applied this to the complete diorama which gives me this.
As you can easily see, in comparison to the heather on Bobby's photos mine is way too purple and in some lights almost blue. Now given the varying colours that heather does flower I could probably have got away with this but I decided I really did want to try and make it a little pinker.
The solution was another round of flowers again based on the Woodland Scenics purple flowering foliage. I took some of the purple flowers I'd mixed with the white weathering powder and shook them with some ground up pink pastel (from a metal tin of Reeves Greyhound pastels that are probably at least twice as old as me). A small amount of scenic glue was then dabbed onto the existing heather flowers before a small amount of the pinker flowers were added. The result is, I hope you will agree, much better.
And now that the heather is flowering the model is essentially finished. I just have to glue the bike in place and tidy up the base to improve the presentation. Both of these need to be done in the next few days before I pack the model ready for travelling down to ExpoNG on Friday. I'll post lots of photos of the finished model after the competition, so if you want to see it before then how about coming to say hello on Saturday -- you'll probably be able to find me at the Narrow Planet stand.
As you can easily see, in comparison to the heather on Bobby's photos mine is way too purple and in some lights almost blue. Now given the varying colours that heather does flower I could probably have got away with this but I decided I really did want to try and make it a little pinker.
The solution was another round of flowers again based on the Woodland Scenics purple flowering foliage. I took some of the purple flowers I'd mixed with the white weathering powder and shook them with some ground up pink pastel (from a metal tin of Reeves Greyhound pastels that are probably at least twice as old as me). A small amount of scenic glue was then dabbed onto the existing heather flowers before a small amount of the pinker flowers were added. The result is, I hope you will agree, much better.
And now that the heather is flowering the model is essentially finished. I just have to glue the bike in place and tidy up the base to improve the presentation. Both of these need to be done in the next few days before I pack the model ready for travelling down to ExpoNG on Friday. I'll post lots of photos of the finished model after the competition, so if you want to see it before then how about coming to say hello on Saturday -- you'll probably be able to find me at the Narrow Planet stand.
Friday, October 23, 2015
A Small Earthquake?
Reports have been coming in that a small earthquake struck just outside Glasgow this morning resulting in some minor earth movements.
Ever since I built the model of Bobby's bike, I've been annoyed by the fact that I hadn't quite got the ground around the abutment right, which meant that the embankment looked a lot taller compared to the bike than it should do. This morning I had another look and decided I just couldn't live with it any longer. Fortunately raising the ground level with a little DAS clay was easy as was blending it into the vegetation I'd already added. It's still not perfect but I think it looks a lot closer to reality now which is the main thing.
Monday, October 19, 2015
Calluna Reducere
So having decided that my approach to modelling heather didn't actually work I was pretty much resigned to the fact that I'd have to go without flowers on the heather, but then I had a flash of inspiration and decided it was worth having one more go.
When I first started thinking about modelling heather I'd looked at using the Woodland Scenics purple flowering foliage. I quickly ruled it out for two reasons. Firstly the strands that the flowers are attached to tend stick out at odd annoying angles no matter how much glue you use. More importantly while the purple looks bright and vibrant in a clump once teased out to cover a dark green bush it is actually quite dark. Obviously the first problem can be dealt with by removing the flowers from the strands but I still discounted it because of the colour.
My moment of inspiration came late on yesterday when I was using some dark earth weathering powder to slightly tone down a bright green grass tuft; if I can make a grass tuft darker using a weathering powder why couldn't I lighten the purple flowers in a similar way? So I took a small box, some white weathering powder, some purple flowers (removed from the strands) and made a martini!
Making heather was then a case of painting a small amount of glue onto a bush and sprinkling on some of the lightened flowers. I also added a few of the dark purple flowers to add a little variety. The excess was then blown of and voila we have heather. In real life it looks even better as the camera makes it look a lot bigger than it really is.
When I first started thinking about modelling heather I'd looked at using the Woodland Scenics purple flowering foliage. I quickly ruled it out for two reasons. Firstly the strands that the flowers are attached to tend stick out at odd annoying angles no matter how much glue you use. More importantly while the purple looks bright and vibrant in a clump once teased out to cover a dark green bush it is actually quite dark. Obviously the first problem can be dealt with by removing the flowers from the strands but I still discounted it because of the colour.
My moment of inspiration came late on yesterday when I was using some dark earth weathering powder to slightly tone down a bright green grass tuft; if I can make a grass tuft darker using a weathering powder why couldn't I lighten the purple flowers in a similar way? So I took a small box, some white weathering powder, some purple flowers (removed from the strands) and made a martini!
Making heather was then a case of painting a small amount of glue onto a bush and sprinkling on some of the lightened flowers. I also added a few of the dark purple flowers to add a little variety. The excess was then blown of and voila we have heather. In real life it looks even better as the camera makes it look a lot bigger than it really is.
Saturday, October 17, 2015
Bloomin' Heather!
Since the last post I've now added the two base layers of static grass to the entire diorama and started to add the heather bushes. The third layer of static grass will be added when the heather is in place to fill the grassy gaps. I'm going to hold off on showing the current states for now, but Bryony thought it looked so good that she wondered if I really should add the purple heather flowers as she was worried I'd ruin it. So that meant I had to expand on my previous small heather experiment to see how a bigger area would look.
Personally I think this looks horrible which is a shame as I thought the small experiment showed promise. So unless I come up with another approach for doing heather flowers in the next ten days then I'm going to leave them off and assume that the diorama represents a time of the year before the heather flowers. I guess you might call that cheating, but I'd prefer to leave the flowers off than completely ruin the model.
Wednesday, October 14, 2015
26" Wheels
On one of my recent posts Iain commented that the mountain bike in the photos really helped to give a sense of scale to the bridge, showing just how small it really is. He was right of course, but unfortunately I couldn't find a decent 4mm scale mountain bike that I could buy. All the bikes I could find were both old fashioned and fairly chunky looking, and if I'm modelling the bridge as it appears now I needed something more modern looking. What I did have was a selection of different sized brass and nickel silver rod and an internet full of pictures of mountain bikes. I also discovered that most mountain bikes use 26" wheels making it easy to scale a side on photo to the right size.
I spent about an hour working out which sized rod to use for the different parts and how I'd construct a model and then about three hours slowly taping small bits of wire onto a wooden board while they were soldered together. The result is this.
Obviously it still needs some cleaning up and then painting (and possibly a chain adding) but I'm really happy with how it's turned out. It's my first real scratch built, completely soldered, model (at least I can't think of anything previously) and while it was a challenge to build the end result seems to have been worth while.
Given that I'm fairly happy with the size of the bike it does mean that on my model the ground doesn't rise quite as steeply from the stream as the bike rests lower down the embankment than in real life, but still I think it does it's job quite well.
I spent about an hour working out which sized rod to use for the different parts and how I'd construct a model and then about three hours slowly taping small bits of wire onto a wooden board while they were soldered together. The result is this.
Obviously it still needs some cleaning up and then painting (and possibly a chain adding) but I'm really happy with how it's turned out. It's my first real scratch built, completely soldered, model (at least I can't think of anything previously) and while it was a challenge to build the end result seems to have been worth while.
Given that I'm fairly happy with the size of the bike it does mean that on my model the ground doesn't rise quite as steeply from the stream as the bike rests lower down the embankment than in real life, but still I think it does it's job quite well.
Monday, October 12, 2015
The First Signs of Spring
Now that I'm happy with the concrete block the next stage is the greenery. I've started to work on this around the concrete block as this area is partly under the bridge and will be very difficult to get to, with the static grass tool, once the bridge is fixed in place. I'd done a number of small experiments before I started but this is how it looks at the moment; it's not a perfect match to the real location but I don't think it's too far off.
While it looks fairly simple it actually takes quite a while as there are a number of different stages involved. Firstly I applied some War World Scenics 1mm summer static grass. Once the glue had dried I dribbled on some more PVA and did a second application of the same grass to help build up a bit of depth. I then stuck a single mixed green Gamer's Grass tuft into the corner of the abutment. At this point it looked reasonable but I wanted a little more variation so I added some Woodland Scenics medium green static grass. I didn't add this in the normal way though, I used the "cigarette" approach described by Giles Favell in Model Railway Journal No. 238 to give clumps of grass.
Looking at the photo I could possibly do with reducing the size of the grass tuft slightly but in general I think that looks pretty good so I can now move on to adding grass to the rest of the diorama and fixing the bridge into place.
While it looks fairly simple it actually takes quite a while as there are a number of different stages involved. Firstly I applied some War World Scenics 1mm summer static grass. Once the glue had dried I dribbled on some more PVA and did a second application of the same grass to help build up a bit of depth. I then stuck a single mixed green Gamer's Grass tuft into the corner of the abutment. At this point it looked reasonable but I wanted a little more variation so I added some Woodland Scenics medium green static grass. I didn't add this in the normal way though, I used the "cigarette" approach described by Giles Favell in Model Railway Journal No. 238 to give clumps of grass.
Looking at the photo I could possibly do with reducing the size of the grass tuft slightly but in general I think that looks pretty good so I can now move on to adding grass to the rest of the diorama and fixing the bridge into place.
Sunday, October 11, 2015
A Second Concrete Block
I had a plan for today that involved starting on the greenery. Before that though I had to glue the concrete block into place and then blend it with the rest of the abutment. This was fairly straightforward. Unfortunately I took one look at it once completed and decided it had to go.
The problem was that I made the concrete block before I had more accurate measurements courtesy of Bobby's trip out to the bridge. This meant that the block was too narrow and when fitted in place there were two steps as the embankment narrowed rather than just one. Originally I thought I'd be able to love with it but once I could see everything blended it was just wrong so it had to go. Of course by this point the block was glued and plastered into place so took a bit of getting off.
I've now cast another, wider, block. In fact I've cast a block that is slightly wider than the real one so that it better matches the rest of the embankment and stonework that I'd already built.
Personally I think that looks like a fairly good representation, but it does mean that I still haven't done any greenery yet.
The problem was that I made the concrete block before I had more accurate measurements courtesy of Bobby's trip out to the bridge. This meant that the block was too narrow and when fitted in place there were two steps as the embankment narrowed rather than just one. Originally I thought I'd be able to love with it but once I could see everything blended it was just wrong so it had to go. Of course by this point the block was glued and plastered into place so took a bit of getting off.
I've now cast another, wider, block. In fact I've cast a block that is slightly wider than the real one so that it better matches the rest of the embankment and stonework that I'd already built.
Personally I think that looks like a fairly good representation, but it does mean that I still haven't done any greenery yet.
Saturday, October 10, 2015
Convex Falls
So having added some surface texture to the water I decided that I still wasn't happy with the stream, specifically the small fall.
The main problem I had with the fall was that the water was following the rock surface, which doesn't happen in real life. In reality water erodes the rock from the top of the fall downwards resulting in the rock having a conave surface, i.e. it drops down before going outwards. Water flowing over the rock though forms a convex shape as the momentum carries it out before gravity pulls it down. With my water following the rock it didn't shoot out enough.
My first thought was to try and build up the water using the Woodland Scenics water effects but I decided I wanted something that naturally had some colour to it and the water effects dries clear. My solution was cotton wool.
So I took a small piece of a cotton wool ball and gently teased it out trying to keep the threads all running in one direction so that they could represent individual falls of water. I then gently tapped this to a bit of folded metal to make it easier to hold before gently wafting on some matt varnish. Once the varnish has dried the teased out cotton wool keeps it's shape remarkably well but still looks nothing like water so the last stage is to paint on a thin layer of the Woodland Scenics realistic water. Once this dries it goes clear leaving a thin film of water with white highlights inside it rather than being painted on the top. A small piece of this is then cut to shape and essentially glued in place using small amounts of water effects which then add more turbulence to blend in the edges.
I think this looks much better than the old falls, although in retrospect I should probably have used a couple of small strips to match the lip of the fall rather than shaping a single piece but I'm not going to try changing it now.
The main problem I had with the fall was that the water was following the rock surface, which doesn't happen in real life. In reality water erodes the rock from the top of the fall downwards resulting in the rock having a conave surface, i.e. it drops down before going outwards. Water flowing over the rock though forms a convex shape as the momentum carries it out before gravity pulls it down. With my water following the rock it didn't shoot out enough.
My first thought was to try and build up the water using the Woodland Scenics water effects but I decided I wanted something that naturally had some colour to it and the water effects dries clear. My solution was cotton wool.
So I took a small piece of a cotton wool ball and gently teased it out trying to keep the threads all running in one direction so that they could represent individual falls of water. I then gently tapped this to a bit of folded metal to make it easier to hold before gently wafting on some matt varnish. Once the varnish has dried the teased out cotton wool keeps it's shape remarkably well but still looks nothing like water so the last stage is to paint on a thin layer of the Woodland Scenics realistic water. Once this dries it goes clear leaving a thin film of water with white highlights inside it rather than being painted on the top. A small piece of this is then cut to shape and essentially glued in place using small amounts of water effects which then add more turbulence to blend in the edges.
I think this looks much better than the old falls, although in retrospect I should probably have used a couple of small strips to match the lip of the fall rather than shaping a single piece but I'm not going to try changing it now.
Wednesday, October 7, 2015
Textured Water
So having said in the previous post that I was going to leave the water alone, I've gone ahead and changed my mind. After more thought I decided that the smooth surface was just way too smooth and almost any texture would be an improvement. So I took the approach that worked best in my experiments (a cotton wool bud to apply the Woodland Scenics Water Effects) and attacked the stream.
Once the water effects had cured I re-applied the extra details on the fall etc. and dry brushed on some ivory paint to highlight certain areas. It's not perfect but I think it looks a lot better than the very smooth surface. Hopefully you all agree?
Sunday, October 4, 2015
White Water Effects
It's been two weeks now since I last posted about the small diorama I'm building for the Dave Brewer Challenge, and almost nothing has changed. The problem has been trying to figure out how to finish the water as I can't fix the bridge in place until that is done, and the rails need to be down before I can start adding ground cover.
My initial plan had been to add ripples across the whole surface of the stream to help show that the water was flowing across the diorama. Unfortunately I had no idea how to do this so I set about experimenting. I've now done four or five experiments and I'm not happy with any of the results. The problem is that at 4mm to the foot ripples need to be small so that they don't look like huge waves and I can't work out how to do this. I have figured out some nice approaches if I ever need a 7mm to the foot stream though so it's not been a complete waste of time.
What this means is that I'm going to leave most of the stream surface alone just adding small amounts of effects where it flows over rocks etc. to produce more white, turbulent water. I've approached this in small stages and currently this is what I have.
I think I probably need to add a little more to this but in principal it looks okay, especially as the stream surface isn't totally flat anyway. As you can see I've also painted the ground where grass and heather will appear. So the next step is a little more water effects before I get the bridge fully incorporated into the scene.
My initial plan had been to add ripples across the whole surface of the stream to help show that the water was flowing across the diorama. Unfortunately I had no idea how to do this so I set about experimenting. I've now done four or five experiments and I'm not happy with any of the results. The problem is that at 4mm to the foot ripples need to be small so that they don't look like huge waves and I can't work out how to do this. I have figured out some nice approaches if I ever need a 7mm to the foot stream though so it's not been a complete waste of time.
What this means is that I'm going to leave most of the stream surface alone just adding small amounts of effects where it flows over rocks etc. to produce more white, turbulent water. I've approached this in small stages and currently this is what I have.
I think I probably need to add a little more to this but in principal it looks okay, especially as the stream surface isn't totally flat anyway. As you can see I've also painted the ground where grass and heather will appear. So the next step is a little more water effects before I get the bridge fully incorporated into the scene.
Sunday, September 20, 2015
Realistic (Blacketty) Water
It's been a while since you last saw the actual diorama as I've been slowly adding the water for the stream. I've lost count of the number of layers I've poured (I think six but I could be wrong) but it's finally at a reasonable depth, both in terms of resin and how it looks.
Rach layer was very thin (about 5ml per layer across the entire scene) and then painted with thin washes of black and burnt umber to try and add depth. I also had the model resting on an angle for the entire duration so that the stream surface was kept horizontal. This means that now that it is dry it looks like it's flowing downhill. The main problem of course is that the surface is too smooth and looks like slow moving water rather than a fast flowing stream. Hopefully some Woodland Scenics water effects should solve that problem though.
Friday, September 18, 2015
Rusty Girders
Over the last few days I've done a little more work on the girders etc. that make up the bulk of the bridge. After posting about this previously I realised I'd missed out the bolts that connect the girders to the concrete block so these have now been added (a small piece of folded brass and more rod for the bolts) and then the whole thing painted.
On the real thing the plates are a lot darker than the girders which I've attempted to replicate. I'm fairly happy with how it looks although it will get a little more weathering when it's bedded into the scene to help tie the bits together.
Thursday, September 17, 2015
Flutterby Chunky
If you've been following this blog for any length of time you'll have noticed that my modelling tends to focus on the man made aspects of a railway (locomotives, rolling stock, bridges, etc.) rather than the natural environment it runs through. One of my main reasons for entering the Dave Brewer challenge this year was to force me into thinking about the scenery around the bridge and so far it seems to have worked. I've experimented with lots of different approaches to painting rocks as well as figuring out how to model dark peaty water (which I promise I will come back to soon). The third major part of the scenery on the diorama is the heather and this has had me worried for a while.
I'd looked at a number of really nice commercial grass mats but none really matched the scenery around the real bridge well enough for me to be happy with, partly as I couldn't find a good representation of the heather. While I still need to decided exactly how I'm going to do the bits of grass not covered by heather (probably a mixture of scatter and static grass) I think, after a number of experiments, that I now have a good way of producing heather.
My first attempt at heather involved using some Woodland Scenics forest blend bushes covered in scatter. Having seen other people have good results using Flower Soft to represent.... flowers and given that they do a packet called heather this seemed like a good starting point. While the colour in the packet looks okay there was quite a lot of white bits that I wasn't happy with as I thought they would be too bright. Given the others colours seemed reasonable I picked out the white bits and then scattered the other bits over a bush covered in glue, and you can see this on the left hand side of the first photo. Unfortunately I think you'll all agree that this doesn't look like heather. The bits are too big (the bush is a reasonable size for the scale I'm working in) and the colours are wrong.
To try and fix at least the size issue I tried again this time with some Ultra Fine Flower Soft called Raspberry Fizz (strangely the Ultra Fine stuff no longer seems to be listed on the website). Unfortunately again there is too much white and this time the bits are so small I couldn't remove them, so I think it looks even worse (right hand side of the first photo).
At this point I was fairly stumped. I knew, from the photos I have of the bridge, roughly what colour the heather should be but I had no idea how to make it. Fortunately my wife had an idea that seems to have worked really well; she suggested I use some chenille. Now given that she has been buying chenille so she can crochet baby blankets I wasn't initially convinced by the idea but she was convinced that chopping the fibres up into little pieces should work so I gave it a go. My first attempt was horrible as the bits of yarn, while the right colour, was way too fluffy. For a second attempt I dunked a piece of yarn in scenic cement and left it to dry before cutting it up and this seems to have reduced the fluffiness to acceptable levels.
Now in close up you might not be convinced that it looks like heather, but if you stand back and look at it from a slightly more sensible distance I think it does a very good job. Yes I could do with separating the fibres a little more so it doesn't clump but in general I'm really happy with how it looks.
For anyone wanting to try and replicate the idea I used James C. Brett Flutterby Chunky yarn, mostly the Mulberry (B21) but also a little Rose Pink (B19) to give a little variation.
I'd looked at a number of really nice commercial grass mats but none really matched the scenery around the real bridge well enough for me to be happy with, partly as I couldn't find a good representation of the heather. While I still need to decided exactly how I'm going to do the bits of grass not covered by heather (probably a mixture of scatter and static grass) I think, after a number of experiments, that I now have a good way of producing heather.
My first attempt at heather involved using some Woodland Scenics forest blend bushes covered in scatter. Having seen other people have good results using Flower Soft to represent.... flowers and given that they do a packet called heather this seemed like a good starting point. While the colour in the packet looks okay there was quite a lot of white bits that I wasn't happy with as I thought they would be too bright. Given the others colours seemed reasonable I picked out the white bits and then scattered the other bits over a bush covered in glue, and you can see this on the left hand side of the first photo. Unfortunately I think you'll all agree that this doesn't look like heather. The bits are too big (the bush is a reasonable size for the scale I'm working in) and the colours are wrong.
To try and fix at least the size issue I tried again this time with some Ultra Fine Flower Soft called Raspberry Fizz (strangely the Ultra Fine stuff no longer seems to be listed on the website). Unfortunately again there is too much white and this time the bits are so small I couldn't remove them, so I think it looks even worse (right hand side of the first photo).
At this point I was fairly stumped. I knew, from the photos I have of the bridge, roughly what colour the heather should be but I had no idea how to make it. Fortunately my wife had an idea that seems to have worked really well; she suggested I use some chenille. Now given that she has been buying chenille so she can crochet baby blankets I wasn't initially convinced by the idea but she was convinced that chopping the fibres up into little pieces should work so I gave it a go. My first attempt was horrible as the bits of yarn, while the right colour, was way too fluffy. For a second attempt I dunked a piece of yarn in scenic cement and left it to dry before cutting it up and this seems to have reduced the fluffiness to acceptable levels.
Now in close up you might not be convinced that it looks like heather, but if you stand back and look at it from a slightly more sensible distance I think it does a very good job. Yes I could do with separating the fibres a little more so it doesn't clump but in general I'm really happy with how it looks.
For anyone wanting to try and replicate the idea I used James C. Brett Flutterby Chunky yarn, mostly the Mulberry (B21) but also a little Rose Pink (B19) to give a little variation.
Tuesday, September 15, 2015
And The Bolts Attach To...
So for today's post I'm back working on my entry for the Dave Brewer challenge. The last time I posted about this I admitted that I'd made a mistake in interpreting the few photos I had by using I shaped beams when in fact they are C shaped in section. As well as showing me the correct girder shape, the photos Bobby kindly took for me also finally explained how the bridge was all held together.
In the previous photos I'd been using I could see that there were quite a few bolts in the side of the girders, but I couldn't see what, if anything, they were attached to. With the new photos though the answer is clear.
As I said with these photos the construction is nice and clear. Originally there were three U shaped plates bolted between the girders; one has broken off entirely and one is fairly close to coming loose. The missing plate explains why there appeared to be just thin air between the girders in the previous photos I was using. As well as the photos Bobby measured the plates as being 75cm long, 60cm wide, and 12cm deep making them easy(ish) to replicate.
Each plate is made from three pieces; a piece of 0.12mm brass sheet for the bit between the girders and a thin strip of 0.3mm styrene for the two side parts. I did think about making the entire plate out of brass but making it in three pieces was easier as I've drilled holes for all 36 bolts which I've made from 0.33mm nickel silver rod. What you don't see in the photos are the numerous jigs I also made to help cut the small strips of styrene, drill the holes, and hold things in position while it was all stuck together. There's almost as much modelling in the jigs as the bridge. Given my intention is to model the railway out of use I've also left off one of the panel sheets (but fitted the bolts) so that it will match the track I've already built. Hopefully the weather will be better tomorrow and I can wave some primer over it in the garden.
In the previous photos I'd been using I could see that there were quite a few bolts in the side of the girders, but I couldn't see what, if anything, they were attached to. With the new photos though the answer is clear.
As I said with these photos the construction is nice and clear. Originally there were three U shaped plates bolted between the girders; one has broken off entirely and one is fairly close to coming loose. The missing plate explains why there appeared to be just thin air between the girders in the previous photos I was using. As well as the photos Bobby measured the plates as being 75cm long, 60cm wide, and 12cm deep making them easy(ish) to replicate.
Each plate is made from three pieces; a piece of 0.12mm brass sheet for the bit between the girders and a thin strip of 0.3mm styrene for the two side parts. I did think about making the entire plate out of brass but making it in three pieces was easier as I've drilled holes for all 36 bolts which I've made from 0.33mm nickel silver rod. What you don't see in the photos are the numerous jigs I also made to help cut the small strips of styrene, drill the holes, and hold things in position while it was all stuck together. There's almost as much modelling in the jigs as the bridge. Given my intention is to model the railway out of use I've also left off one of the panel sheets (but fitted the bolts) so that it will match the track I've already built. Hopefully the weather will be better tomorrow and I can wave some primer over it in the garden.
Sunday, September 6, 2015
C Not I
So having been quite happy in yesterday's post about how accurate my model of the bridge up on Duchal Moor had turned out, today I'll move onto a detail I got wrong.
Virtually ever photo I'd been able to find of the bridge was either taken from the tracks or at eye level standing next to the stream. Neither of these views allowed you to see any details under the sleepers between the two support beams. Having now been kindly provided with a large number of detailed photos by Bobby I can see exactly how the bridge is constructed and I've made one crucial mistake. I'd assumed that the girders were I section beams but they are actually C shaped in section. While you probably wouldn't notice the difference on the model, the different shape would stop me adding some of the other details I now know about. Fortunately removing the girders from the rail only involved some careful use of a modelling knife to break the glue.
Measurement wise though I was again fairly close. I'd been using I beams that were 2.4mm tall which would equate to 7 1/4 inches and Bobby measured them at 20cm tall or just over 7 3/4 inches so close enough. Now while I could buy C section beam of the same height I'm instead going to cut off bits of the I to turn it into a C as that will give me a more accurate width as the real beams are 3.5cm thick so should be less than 0.5mm at this scale whereas the plastic C beam would be 1mm wide.
Virtually ever photo I'd been able to find of the bridge was either taken from the tracks or at eye level standing next to the stream. Neither of these views allowed you to see any details under the sleepers between the two support beams. Having now been kindly provided with a large number of detailed photos by Bobby I can see exactly how the bridge is constructed and I've made one crucial mistake. I'd assumed that the girders were I section beams but they are actually C shaped in section. While you probably wouldn't notice the difference on the model, the different shape would stop me adding some of the other details I now know about. Fortunately removing the girders from the rail only involved some careful use of a modelling knife to break the glue.
Measurement wise though I was again fairly close. I'd been using I beams that were 2.4mm tall which would equate to 7 1/4 inches and Bobby measured them at 20cm tall or just over 7 3/4 inches so close enough. Now while I could buy C section beam of the same height I'm instead going to cut off bits of the I to turn it into a C as that will give me a more accurate width as the real beams are 3.5cm thick so should be less than 0.5mm at this scale whereas the plastic C beam would be 1mm wide.
Saturday, September 5, 2015
Accuracy
I'm constantly amazed at the kindness and generosity of people I've got to know through this, and my other, blogs. Over the last year I've been given a set of track gauges by Paul and Iain has sent me some offcuts of Palight to experiment with as well as sharing numerous research photographs to help with my Welsh slate quarry wagon models. To that list I can now add Bobby who has kindly cycled out to the bridge on Duchal Moor to take some research photographs and to run a tape measure over numerous bits of the bridge. I'd already been using one of Bobby's photographs of the bridge to help with the model but this new set shows so many details that I'm going to be able to really enrich the model.
I'll keep most of the photos back for now and show them as I replicate the details, but here is how the bridge looked yesterday lunchtime.
So given I now have some measurements how accurate is my model? Well lets start with the sleepers as they were the first thing I modelled. My best guess from the photos was that they were approximately 2' 9" wide, but I modelled them as 3' due to the slightly heavier, and hence wider, rail I was using. Rather than trying to hand cut thin strips of wood I used OO gauge sleepers from C&L Finescale cut down to 12mm. This meant my sleepers were modelling 3' wide, by 10" across, by 2.4" deep. Bobby measured them yesterday at 90 cm by 25 cm by 6 cm, which when converted to feet and inches gives 2 feet 11 7⁄16 inches by 9 27⁄32 inches by 2 23⁄64 inches. So my original guesstimate of 2' 9" wide was a little out but the actual width I modelled, 3 feet, was pretty much spot on as are the other dimensions.
The two other main measurements are the span of the bridge and the height of the concrete block supporting one end as these basically set the dimensions of the diorama. I've ended up with the bridge spanning a scale 14' 3" whereas Bobby measured it as about 5m or just over 16 feet, so mine is a little bit short but not by much. The concrete support measured out at 1.6m tall by 1.33m wide and 75cm deep or roughly 5' by 4' 4" by 2' 5". The block I cast was based on measurements of 5' tall by 3' wide by 1' deep. I got the depth badly wrong due to not being able to see exactly where the block stopped and the stone embankment started. The height is spot on though even if the width is over a foot too narrow.
Given I was originally working from just a few photos I don't think I did too badly and the measurements are close enough that the difference won't alter the look of the model which means I don't need to go back and change anything fundamental.... phew!
I'll keep most of the photos back for now and show them as I replicate the details, but here is how the bridge looked yesterday lunchtime.
So given I now have some measurements how accurate is my model? Well lets start with the sleepers as they were the first thing I modelled. My best guess from the photos was that they were approximately 2' 9" wide, but I modelled them as 3' due to the slightly heavier, and hence wider, rail I was using. Rather than trying to hand cut thin strips of wood I used OO gauge sleepers from C&L Finescale cut down to 12mm. This meant my sleepers were modelling 3' wide, by 10" across, by 2.4" deep. Bobby measured them yesterday at 90 cm by 25 cm by 6 cm, which when converted to feet and inches gives 2 feet 11 7⁄16 inches by 9 27⁄32 inches by 2 23⁄64 inches. So my original guesstimate of 2' 9" wide was a little out but the actual width I modelled, 3 feet, was pretty much spot on as are the other dimensions.
The two other main measurements are the span of the bridge and the height of the concrete block supporting one end as these basically set the dimensions of the diorama. I've ended up with the bridge spanning a scale 14' 3" whereas Bobby measured it as about 5m or just over 16 feet, so mine is a little bit short but not by much. The concrete support measured out at 1.6m tall by 1.33m wide and 75cm deep or roughly 5' by 4' 4" by 2' 5". The block I cast was based on measurements of 5' tall by 3' wide by 1' deep. I got the depth badly wrong due to not being able to see exactly where the block stopped and the stone embankment started. The height is spot on though even if the width is over a foot too narrow.
Given I was originally working from just a few photos I don't think I did too badly and the measurements are close enough that the difference won't alter the look of the model which means I don't need to go back and change anything fundamental.... phew!
Monday, August 31, 2015
Dry Land
So a little bit of paint later and I now have rocks and a stream bed. I'll extend the peat colouring onto the banks to give a base for the plants but for now this makes it clear where the stream runs.
From this angle the lack of depth to the diorama is more obvious as the land doesn't rise up behind the bridge as it does in real life but I think it looks pretty close all the same. Next up will be pouring the water which will take a few days to do the layers so it's unlikely there will be a progress report until I have something sensible to show.
Saturday, August 29, 2015
Now With Sleepers
I've spent the last couple of days slowly adding the sleepers to the rails so I can see how the section over the bridge will look. The sleepers in the undergrowth can wait until later.
It's not a perfect replica, when compared to Bobby Mhor's photo, but I'm pretty happy with how that looks.
Subscribe to:
Posts (Atom)