Some of you may remember that back in March I built a couple of short sections of stone walling using brick papers from scalescenes.com. The first attempt was wrong as the stones were too big, and while the second attempt was better, the wall was just too flat with no relief. Having now abandoned brick papers for full structures in favour of embossed plastikard I decided I needed to have another go at building a stone wall. The result is this little test piece (using the driver from the Brian Madge Quarry Hunslet kit to give a sense of scale).
Personally I think this looks an order of magnitude better than my previous attempts. It did, however, taken an order of magnitude longer to produce as well. In fact that short piece of wall took all day, although some of that was waiting for DAS clay to dry. What you are looking at is a wall where each stone was cut and laid separately to produce a dry stone wall; albeit with PVA to keep the stones in place.
The technique I've used is based on Ian Nuttall's description of how he built dry stone walls for his layout (February 2013 edition of Railway Modeller). The idea is to create 6mm wide strips of DAS clay of varying heights that can be cut to make individual stones and used to model a 1' 6" wide wall. Rolling, measuring and and cutting DAS clay to the right sizes would be a pain, which is where the plastic tagliatelle comes in to play.
I built a jig from a sheet of 2mm plastikard and various sized square sections of plastruct. I used 1.5mm, 2mm, 2.5mm, 3.2mm, and 4mm sections to give five channels 6mm wide allowing me to model stones 4 1/2", 6", 7 1/2", 9 2/3" and 1' tall by simply pushing DAS into the channels of the jig. The problem is removing the DAS from the jig. The trick here is to place one of the plastic strips at the bottom of the channel, then add the DAS, and then just lift the plastic strip to remove the clay. Once the DAS has dried the plastic strip peels off easily and can be reused.
Once the clay strips have dried (I should possibly have left them a little longer but I was getting inpatient) they can be cut into individual stones; I found my track cutters worked really well for this bit. The wall is started by laying down a thin ribbon of PVA and placing the first course of stones. Small dabs of PVA are then used to add the further layers trying to avoid any leaking out the side of a join. I aimed for a level topped four foot high wall, before then adding the capping stones, which were slightly rounded, to give a wall approximately 4' 6" high. This seems to look about right next to the figure.
I painted the wall initially with RailMatch weathered stone (#2426) before giving the whole thing a black wash making sure to get the wash deep into the cracks where the base coat hadn't necessarily flowed. I then lightly dry brushed more weathered stone and some khaki (Model Color #988) to add a little variation. The final touch (which is mostly hidden behind the greenery) was to dry brush a little brown sand (Model Color #876) along the bottom of the wall to represent dirt having splashed up.
While the wall looked good at that point (I forgot to take any photos) I thought it was worth adding more scenery to see how it would look in the context of a layout rather than in isolation. I used some cheap burnt umber acrylic (I bought a large tube ages ago from WH Smiths) to provide a base colour and to hide the white cardboard. I then used Woodland Scenics green blend blended turf to provide ground cover before adding various shades of Woodland Scenics bushes and foliage clumps for bushes around the wall edges. The final touch was a little bit of yellow flowering foliage to the right side to add more colour.
Hopefully you will all agree that this looks a lot better than my previous brick paper attempts at making walls. Having said that it still isn't perfect, mostly as I think the proportion of large stones in the wall is too high; locally the walls are mostly small stones rather than large chunks. Changing the proportion of stone sizes though is easy so I think this is another scenic technique that I'm now happy with so another piece of the puzzle falls into place.
Showing posts with label Brian Madge. Show all posts
Sunday, November 9, 2014
Friday, May 30, 2014
8ft Freelance Flat Wagon
So having designed and had printed some simple flat wagons for use on the new layout the next step was to paint them. So far I've just done one of the three I had printed due to a mishap with the primer which has required the other two to be stripped back. Anyway here is how the first one turned out.
The light in the second picture makes it look a lot more yellow than it really is, the first photo is a more accurate depiction of the colouring. When painting I'm usually happiest with big blocks of a single colour but I new I couldn't get away with that for the wood this time. I'll blog about how I actually produced the effect separately but I have to say I'm quite happy with how it has turned out. As I said in the previous post, if you happen to want one I'll happily sell you as many as you want!
Saturday, May 10, 2014
Ready To Run
So after the helpful advice from Paul and Bill in the comments to the previous post I've gone ahead and fitted the Greenwich couplings to all three OO9 items I've built so far.
As a compromise between aesthetics and functionality I've only added the hook part to both ends of the locomotives while the open carriage also has the loop fitted at both ends. I'm a little concerned about one of the loops as while a magnet held near it causes it to lift, it doesn't always drop back into place reliably, but I can probably tweak that at a later point when I actually start thing about where the uncoupling ponits will be, but for that I still need to decide on a layout plan.
Monday, May 5, 2014
Quarry Hunslet: The Backstory
Not very long ago, in the bottom left-hand corner of Yorkshire, there was a factory. It wasn't a very big factory or a very important factory but it's owner was very proud of it. While you could easily walk from one side of the factory to the other its owner decided that it would be improved by the addition of a railway. Not a very long railway or a very important railway, but something that would help move things around and, if he was being honest, that he could ride at the weekends for fun.
There were quite a few companies making steam engines in the local area, but one specific company caught the factory owner's eye. The Hunslet Engine Company were making little engines for working in the Welsh slate quarries, and if they could handle that then surely they could move a few crates around his factory. The factory owners wife wasn't really sure he needed a railway at all, but she was supportive of the idea and even helped to choose the colour for the new locomotive.
So the day finally dawned when the new locomotive would arrive, and the factory owner insisted his wife join him for the delivery as he had a surprise in store. The engine arrived on the back of a wagon under a large tarpaulin to keep it clean. The factory owner climbed up on to the back of the wagon and pulled aside the tarpaulin to reveal the locomotive in all it's crimson glory. He then looked at his wife who was smiling, even though she still wasn't sure he really needed a railway, as there on the side of the locomotive was her name, and no one had ever named a steam locomotive after her before.
Firstly, my apologies to Oliver Postgate for the origins of the backstory, especially as I couldn't quite manage to maintain the same style throughout. As the final post on the building of this kit we have the fitting of the final detailing components; the name and work plates.
As I discussed in the previous post the plates were ordered from Narrow Planet and are a customized set of these plates. As well as customizing the name I also had the work plates read as "No 1. 2014" given this is the first steam loco I've built and it was completed in 2014, not that you can read the numbers at this scale. Given that I hadn't known what colour I was going to paint the plates when I ordered them they arrived as unpainted etched brass. Painting with acrylic black was easy and then I brushed on some acrylic satin varnish to protect the paint during handling, and so it would match the rest of the locomotive.
The plates were then carefully removed from the fret (the brass is very fine and so easy to distort) and with the help of some paper templates glued into place. I actually don't use glue for this, after a previous renumbering disaster, instead I brush a small amount of Humbrol enamel satin varnish on to the back of the plate (I find the enamel works better than the acrylic). This gives plenty of time to position the plate before it dries, and doesn't tend to mark the already varnished paint.
So there we have it the locomotive is now complete. At some point I'll probably glue the driver into position (a moving train without a driver looks wrong), but for now I quite like being able to look into the cab and see all the controls I spent ages painting.
There were quite a few companies making steam engines in the local area, but one specific company caught the factory owner's eye. The Hunslet Engine Company were making little engines for working in the Welsh slate quarries, and if they could handle that then surely they could move a few crates around his factory. The factory owners wife wasn't really sure he needed a railway at all, but she was supportive of the idea and even helped to choose the colour for the new locomotive.
So the day finally dawned when the new locomotive would arrive, and the factory owner insisted his wife join him for the delivery as he had a surprise in store. The engine arrived on the back of a wagon under a large tarpaulin to keep it clean. The factory owner climbed up on to the back of the wagon and pulled aside the tarpaulin to reveal the locomotive in all it's crimson glory. He then looked at his wife who was smiling, even though she still wasn't sure he really needed a railway, as there on the side of the locomotive was her name, and no one had ever named a steam locomotive after her before.
Firstly, my apologies to Oliver Postgate for the origins of the backstory, especially as I couldn't quite manage to maintain the same style throughout. As the final post on the building of this kit we have the fitting of the final detailing components; the name and work plates.
As I discussed in the previous post the plates were ordered from Narrow Planet and are a customized set of these plates. As well as customizing the name I also had the work plates read as "No 1. 2014" given this is the first steam loco I've built and it was completed in 2014, not that you can read the numbers at this scale. Given that I hadn't known what colour I was going to paint the plates when I ordered them they arrived as unpainted etched brass. Painting with acrylic black was easy and then I brushed on some acrylic satin varnish to protect the paint during handling, and so it would match the rest of the locomotive.
The plates were then carefully removed from the fret (the brass is very fine and so easy to distort) and with the help of some paper templates glued into place. I actually don't use glue for this, after a previous renumbering disaster, instead I brush a small amount of Humbrol enamel satin varnish on to the back of the plate (I find the enamel works better than the acrylic). This gives plenty of time to position the plate before it dries, and doesn't tend to mark the already varnished paint.
So there we have it the locomotive is now complete. At some point I'll probably glue the driver into position (a moving train without a driver looks wrong), but for now I quite like being able to look into the cab and see all the controls I spent ages painting.
Sunday, May 4, 2014
Quarry Hunslet: Preparing to Name
Given that when I've completely finished the Quarry Hunslet it might be a while before I have any more progress to report and as I think there is enough in the naming process to warrant at least a couple of posts I thought I'd drag things out a little longer.
As I've mentioned many times the kit is specifically designed to build into Dorothea, Hunslet Engine Company works number 763, and it contains appropriate name plates on the etched brass fret of parts. These, like the rest of the etchings, are exceptionally well done, and I thought it a shame for them to just disappear into the bits box without showing them to you. I also decided to use them to decide which colour the actual name plates should be painted; most are either black or red and as I had two plates to experiment with I painted one black and one red. If you don't know how to paint the name plates then Narrow Planet have produced a useful video. Once the paint had dried, holding the fret up against the locomotive and the decision to paint them black was fairly quickly arrived at, as it looks much better against the crimson body colour.
As I mentioned in a previous post as well as replacement nameplates I'd ordered matching Hunslet Engine Company workplates as well from Narrow Planet. Specifically I'd ordered a customized set of these plates intended for Brian's other Quarry Hunslet kit of Velinheli. I'm not going to give away the name yet, so I've just borrowed the artwork from the Narrow Planet website so you get a feel of what I'll be adding.
The final step before adding the plates is to produce paper templates to aid in positioning them on the model. Remember these things are going to be tiny, and will be difficult to accurately position, especially once the back is sticky with glue or varnish to hold it in place.
On a related note, when browsing through the Narrow Planet website I spotted that the Lancashire & Yorkshire Railway number plates (the standard size not the smaller pug plates) that I discussed in detail back in 2012 are now available as a standard item, which will be great for anyone wanting to renumber the recent Bachmann model of the Aspinal 2-4-2T, especially anyone who wants an L&YR version but missed out on the limited number available in that livery.
As I've mentioned many times the kit is specifically designed to build into Dorothea, Hunslet Engine Company works number 763, and it contains appropriate name plates on the etched brass fret of parts. These, like the rest of the etchings, are exceptionally well done, and I thought it a shame for them to just disappear into the bits box without showing them to you. I also decided to use them to decide which colour the actual name plates should be painted; most are either black or red and as I had two plates to experiment with I painted one black and one red. If you don't know how to paint the name plates then Narrow Planet have produced a useful video. Once the paint had dried, holding the fret up against the locomotive and the decision to paint them black was fairly quickly arrived at, as it looks much better against the crimson body colour.
As I mentioned in a previous post as well as replacement nameplates I'd ordered matching Hunslet Engine Company workplates as well from Narrow Planet. Specifically I'd ordered a customized set of these plates intended for Brian's other Quarry Hunslet kit of Velinheli. I'm not going to give away the name yet, so I've just borrowed the artwork from the Narrow Planet website so you get a feel of what I'll be adding.
The final step before adding the plates is to produce paper templates to aid in positioning them on the model. Remember these things are going to be tiny, and will be difficult to accurately position, especially once the back is sticky with glue or varnish to hold it in place.
On a related note, when browsing through the Narrow Planet website I spotted that the Lancashire & Yorkshire Railway number plates (the standard size not the smaller pug plates) that I discussed in detail back in 2012 are now available as a standard item, which will be great for anyone wanting to renumber the recent Bachmann model of the Aspinal 2-4-2T, especially anyone who wants an L&YR version but missed out on the limited number available in that livery.
Saturday, May 3, 2014
Quarry Hunslet: The Nameless Wonder
So having completed the main body in the last post, I set about painting the elements of the motion that needed it. Unfortunately while masking up the slidebars I managed to re-break one of them. Given that the glue I used last time obviously hadn't held the joint past a light handling, I decided to to strengthen the repair this time. Fortunately it was the top slidebar that had broken where it joins the cylinder, which meant I could add a small piece of scrap brass (from the fret of parts) running across the join between the cylinder and slidebar without it being overly visible or affecting the motion. Once painted it's almost invisible, and the join is nice and strong.Once the cylinders etc. were painted it was time to reassemble the entire model, put it on the track, apply power, cross my fingers and hope I hadn't screwed anything up...
Yay! It still runs. The sigh of relief could probably be heard for miles around. So there we have it, a completed Quarry Hunslet that just needs a name and makers plates.
Labels:
Brian Madge,
modelling,
OO9,
video
Friday, May 2, 2014
Quarry Hunslet: Glazed and Confused
I've only got a short update today, but I thought it worth posting to try and lessen Iain's withdrawal symptoms (see here and here).
While the locomotive probably doesn't look much different from the last photo I showed you, I've added two small details today. The first job this morning was to glaze the cab windows. I did this using Micro Kristal Klear in the same way as I did the cab windows of the lorry I built for Jerusalem and more recently the Baguley-Drewry. Given how small the windows are this was the job of just a few moments -- much easier than trying to cut plastic to size!
The second detailing step was to re-varnish the smokebox and chimney. I'd previously sealed the paint using an aerosol of Humbrol satin varnish. I think the satin effect is glossy enough to represent the paint you usually find on a steam locomotive as gloss paints/varnish looks, at least to my eyes, too shiny in this scale. The one area where satin varnish doesn't work though is the smokebox and chimney. If you look at any photo of any steam engine you'll notice the this area of the loco is quite matt in appearance. I'm assuming this is to do with the heat either requiring a different paint, or altering the paint to make it appear matt. Either way, I gently brush painted on a little Humbrol matt acrylic varnish to add this extra detail.
And finally ... I'm giving advance notice to all those Quarry Hunslet addicts out there that I think there will only be two more posts before this build is complete!
While the locomotive probably doesn't look much different from the last photo I showed you, I've added two small details today. The first job this morning was to glaze the cab windows. I did this using Micro Kristal Klear in the same way as I did the cab windows of the lorry I built for Jerusalem and more recently the Baguley-Drewry. Given how small the windows are this was the job of just a few moments -- much easier than trying to cut plastic to size!
The second detailing step was to re-varnish the smokebox and chimney. I'd previously sealed the paint using an aerosol of Humbrol satin varnish. I think the satin effect is glossy enough to represent the paint you usually find on a steam locomotive as gloss paints/varnish looks, at least to my eyes, too shiny in this scale. The one area where satin varnish doesn't work though is the smokebox and chimney. If you look at any photo of any steam engine you'll notice the this area of the loco is quite matt in appearance. I'm assuming this is to do with the heat either requiring a different paint, or altering the paint to make it appear matt. Either way, I gently brush painted on a little Humbrol matt acrylic varnish to add this extra detail.
And finally ... I'm giving advance notice to all those Quarry Hunslet addicts out there that I think there will only be two more posts before this build is complete!
Labels:
Brian Madge,
Humbrol,
modelling,
OO9
Saturday, April 26, 2014
Quarry Hunslet: It's All In The Details
So having touched up the few areas that needed work after spraying the body colour I set about touching in the remaining details.
First up were the buffer beams. Now as I mentioned in the previous post I'd bought a pot of Buffer Beam Red acrylic paint from Humbrol's rail colour series, and I had intended to use this to (funnily enough) paint the buffer beams. I was rather shocked when I opened the tin to find that the paint colour really doesn't match the sticker and probably falls foul of the trade description act for not really being red. Having said that it does appear pretty close to the buffer beam on the N gauge Graham Farish loco I own so maybe it is accurate. Either way I thought I'd give it the benefit of the doubt and duly painted both the front and back buffer beams. Well it's definitely not right, or at least it didn't look right, so it was painted over with a thin layer of Model Color red (70.947) which I think you will agree looks the part.
Next I dealt with the window frames, which were more than a little taxing. I wanted the frames to be brass so this required painting them black and then using the same lacquer I used for the cab controls while ensuring I didn't get any on the red body paint. Of course I managed to slip in a few places and so I've had to touch up the paint slightly, but it really isn't noticeable. The windows still need glazing but I can't do that until I've varnished everything so as not to frost the "glass".
After the windows I moved on to fitting the handrails. Annoyingly the left one looks on even more of an angle than it did before, goodness knows why. Anyway the knobs were painted black before fixing to the body so that I didn't run the risk of getting black paint on the saddle tank. The rails were then painted in-situ and everything glued into place. The final step was to slip the whistle through the hole in the mounting bracket, dot a spot of gel superglue on the end of the pipe and then rotate into position.
I'm really pleased with how the details have pulled together, and it certainly looks a lot better than it did a few days ago!
First up were the buffer beams. Now as I mentioned in the previous post I'd bought a pot of Buffer Beam Red acrylic paint from Humbrol's rail colour series, and I had intended to use this to (funnily enough) paint the buffer beams. I was rather shocked when I opened the tin to find that the paint colour really doesn't match the sticker and probably falls foul of the trade description act for not really being red. Having said that it does appear pretty close to the buffer beam on the N gauge Graham Farish loco I own so maybe it is accurate. Either way I thought I'd give it the benefit of the doubt and duly painted both the front and back buffer beams. Well it's definitely not right, or at least it didn't look right, so it was painted over with a thin layer of Model Color red (70.947) which I think you will agree looks the part.
Next I dealt with the window frames, which were more than a little taxing. I wanted the frames to be brass so this required painting them black and then using the same lacquer I used for the cab controls while ensuring I didn't get any on the red body paint. Of course I managed to slip in a few places and so I've had to touch up the paint slightly, but it really isn't noticeable. The windows still need glazing but I can't do that until I've varnished everything so as not to frost the "glass".
After the windows I moved on to fitting the handrails. Annoyingly the left one looks on even more of an angle than it did before, goodness knows why. Anyway the knobs were painted black before fixing to the body so that I didn't run the risk of getting black paint on the saddle tank. The rails were then painted in-situ and everything glued into place. The final step was to slip the whistle through the hole in the mounting bracket, dot a spot of gel superglue on the end of the pipe and then rotate into position.
I'm really pleased with how the details have pulled together, and it certainly looks a lot better than it did a few days ago!
Labels:
Brian Madge,
Humbrol,
Model Color,
modelling,
OO9
Quarry Hunslet: Inside The Cab
Before I had all the problems painting the outside of the locomotive I'd painted the inside of the cab while I could still easily get a paintbrush in there. There are two parts to this, painting the backhead controls and painting the inside of the cab walls.
The first job was to touch in the details on the backhead and for this I used three paints. I gave the main backhead surface a light dry brushing with RailMatch oily steel to help bring out some of the details and I used Humbrol acrylic buffer beam red (number 406 from their Rail Colour range) for the regulator handle. For the brass I used Alclad 2 polished brass lacquer. This isn't something I'd used before but it gave just the effect I was looking for. You are supposed to airbrush the lacquer over a gloss surface to give a high shine finish, but I brush painted it over a satin surface which gives a more aged look. I used this lacquer rather than a paint for two reasons. Firstly I couldn't seem to find a brass paint in any of the ranges my local model shop stocks, but more importantly I'm not really a fan of using metallic paints at this scale, unless they are being sparingly dry brushed. I find that the shiny flecks in the metallic paints (that give them the metallic look) are always fairly large and just look really wrong at the small scale we are working with. This lacquer doesn't suffer from this problem at all and I'm betting it would look fantastic airbrushed onto a larger area.
The second job was to paint the inside of the cab walls. From photos, and from having visited the odd cab over the years, I've noticed that generally the bottom half of the walls are painted black, while the top half is usually a buff or cream colour. I'm guessing the use of the lighter colour is to make the cab feel bigger and less claustrophobic. Given the paints I had to hand I used ivory and black from the Model Color range; painting the ivory on first and then masking to get a straight edge to paint the black against.
Personally I think both parts have worked really well, and now that they are assembled together it really does look good.
The first job was to touch in the details on the backhead and for this I used three paints. I gave the main backhead surface a light dry brushing with RailMatch oily steel to help bring out some of the details and I used Humbrol acrylic buffer beam red (number 406 from their Rail Colour range) for the regulator handle. For the brass I used Alclad 2 polished brass lacquer. This isn't something I'd used before but it gave just the effect I was looking for. You are supposed to airbrush the lacquer over a gloss surface to give a high shine finish, but I brush painted it over a satin surface which gives a more aged look. I used this lacquer rather than a paint for two reasons. Firstly I couldn't seem to find a brass paint in any of the ranges my local model shop stocks, but more importantly I'm not really a fan of using metallic paints at this scale, unless they are being sparingly dry brushed. I find that the shiny flecks in the metallic paints (that give them the metallic look) are always fairly large and just look really wrong at the small scale we are working with. This lacquer doesn't suffer from this problem at all and I'm betting it would look fantastic airbrushed onto a larger area.
The second job was to paint the inside of the cab walls. From photos, and from having visited the odd cab over the years, I've noticed that generally the bottom half of the walls are painted black, while the top half is usually a buff or cream colour. I'm guessing the use of the lighter colour is to make the cab feel bigger and less claustrophobic. Given the paints I had to hand I used ivory and black from the Model Color range; painting the ivory on first and then masking to get a straight edge to paint the black against.
Personally I think both parts have worked really well, and now that they are assembled together it really does look good.
Labels:
Alclad 2,
Brian Madge,
Humbrol,
Model Color,
modelling,
OO9,
RailMatch
Friday, April 25, 2014
Quarry Hunslet: The Crimson Horror
So, as you may have seen from my rather brief previous post, painting the main body colour of the locomotive did not at all go to plan. Fortunately it was possible to rescue the situation as you can see from todays photo.
Here in Yorkshire we haven't had much sun today which explains why the colour looks way brighter than it really is (the camera over compensating for the terrible light). In reality I've painted it using Humbrol acrylic #20 "crimson", which is quite a dark red. There are a number of areas that need touching up but in general the main areas are perfect.
Now you've seen that the situation was recoverable, let's back up and see how I ended up in quite such a mess. After painting the cab controls (which I'll come back to in a later post) I carefully masked up the inside of the cab while it was still separate from the body and then glued it into place. I then masked up the rest of the model (using the excellent Tamiya masking tape). I also used some Humbrol maskol at the edges of the tape, or where it was difficult to line up the tape properly, including around the cab windows. I then sprayed on the Humbrol crimson paint.
My first mistake was to use too much paint. Paul had warned me that red in particular is quite translucent and so benefits from a white primer. In fact this red paint was so translucent that I could see the white primer through it in places. To stop the white showing through I had to add more paint. Once the paint was dry (or at least I thought it was) I noticed that it appeared to have run on one of the cab side panels. It was annoying but I could probably have lived with that. What I couldn't live with was what happened next.
Now I don't know quite what the problem was but as I removed the maskol I'd used around the windows it pulled off the top layer of paint leaving just the primer behind. If this wasn't bad enough as I tried to remove the masking tape from inside the cab I popped one of the side panels loose. Finally when trying to remove the masking tape from the chimney it simply fell off. At this point I was not a happy bunny and certainly not relishing the thought of repainting. One of the main problems was that I wouldn't be able to mask things up in the same way now the cab was (mostly) attached to the footplate, so I decided to brush paint instead of spraying.
Before I could repaint I had to finish removing the old paint which given it was all on a metal surface came off quite easily with the aid of cotton wool buds, nail polish remover and blunted cocktail sticks. I did have to replace the rivet transfers though as they came off with the paint. So once everything was nicely cleaned up I brushed on Humbrol acrylic grey primer and left it to dry. To say it was streaky was a bit of an understatement but I decided I'd continue on and brush on the top coat; still Humbrol acrylic crimson, but from a small pot. This was definitely not a wise move. It turns out that none of the Humbrol acrylic paints brush on well; I suppose they might if diluted, but then I'd probably have the same translucent problem. By this stage it was looking pretty horrible, so I started to strip the paint off for a second time.
Once the paint was cleaned off for a second time, I again masked the black areas and the inside of the cab as well as I could and sprayed on the primer. This time I went for a red oxide primer in the hope that even if the crimson was slightly translucent it wouldn't show up. The primer went on well, so I then sprayed the crimson again, being careful to use as little paint as possible. After leaving it to dry over night I carefully removed the masking tape and this time everything went to plan. Not only did the paint stay attached but I hadn't ruined the cab interior either.
So I now have some tidying up to do (the edge of the cab roof for instance), and then I can finish painting in the details.
Here in Yorkshire we haven't had much sun today which explains why the colour looks way brighter than it really is (the camera over compensating for the terrible light). In reality I've painted it using Humbrol acrylic #20 "crimson", which is quite a dark red. There are a number of areas that need touching up but in general the main areas are perfect.
Now you've seen that the situation was recoverable, let's back up and see how I ended up in quite such a mess. After painting the cab controls (which I'll come back to in a later post) I carefully masked up the inside of the cab while it was still separate from the body and then glued it into place. I then masked up the rest of the model (using the excellent Tamiya masking tape). I also used some Humbrol maskol at the edges of the tape, or where it was difficult to line up the tape properly, including around the cab windows. I then sprayed on the Humbrol crimson paint.
My first mistake was to use too much paint. Paul had warned me that red in particular is quite translucent and so benefits from a white primer. In fact this red paint was so translucent that I could see the white primer through it in places. To stop the white showing through I had to add more paint. Once the paint was dry (or at least I thought it was) I noticed that it appeared to have run on one of the cab side panels. It was annoying but I could probably have lived with that. What I couldn't live with was what happened next.
Now I don't know quite what the problem was but as I removed the maskol I'd used around the windows it pulled off the top layer of paint leaving just the primer behind. If this wasn't bad enough as I tried to remove the masking tape from inside the cab I popped one of the side panels loose. Finally when trying to remove the masking tape from the chimney it simply fell off. At this point I was not a happy bunny and certainly not relishing the thought of repainting. One of the main problems was that I wouldn't be able to mask things up in the same way now the cab was (mostly) attached to the footplate, so I decided to brush paint instead of spraying.
Before I could repaint I had to finish removing the old paint which given it was all on a metal surface came off quite easily with the aid of cotton wool buds, nail polish remover and blunted cocktail sticks. I did have to replace the rivet transfers though as they came off with the paint. So once everything was nicely cleaned up I brushed on Humbrol acrylic grey primer and left it to dry. To say it was streaky was a bit of an understatement but I decided I'd continue on and brush on the top coat; still Humbrol acrylic crimson, but from a small pot. This was definitely not a wise move. It turns out that none of the Humbrol acrylic paints brush on well; I suppose they might if diluted, but then I'd probably have the same translucent problem. By this stage it was looking pretty horrible, so I started to strip the paint off for a second time.
Once the paint was cleaned off for a second time, I again masked the black areas and the inside of the cab as well as I could and sprayed on the primer. This time I went for a red oxide primer in the hope that even if the crimson was slightly translucent it wouldn't show up. The primer went on well, so I then sprayed the crimson again, being careful to use as little paint as possible. After leaving it to dry over night I carefully removed the masking tape and this time everything went to plan. Not only did the paint stay attached but I hadn't ruined the cab interior either.
So I now have some tidying up to do (the edge of the cab roof for instance), and then I can finish painting in the details.
Labels:
Brian Madge,
Humbrol,
modelling,
OO9,
Tamiya
Wednesday, April 23, 2014
In Need Of A Little Restoration
Let's just say that painting the body colour didn't exactly go to plan and leave it at that. I'll recount the whole nightmarish tale when I have some slightly more heartening progress to report.
Labels:
Brian Madge,
modelling,
OO9
Tuesday, April 22, 2014
Quarry Hunslet: Primed and Ready
While I was a little worried about actually having the skills to build this locomotive, I'm also worried about my painting skills after the disaster that was the Baguley-Drewry. I have just invested in an airbrush (more on that in a later post), but for this loco I'm going to stick with what I know and use aerosol cans of Humbrol paint. There are two main changes to my approach from last time. One I'm going to take more time to ensure each colour is fully dry before masking, and two I'm using more expensive masking tape (Tamiya).
The first step to painting was to dismantle the locomotive to remove the motor and the cylinders etc. I then primed it with a white primer meant for painting cars to provide a good base colour for the later colours.
I'm still treating the cab and body separately until I've painted the cab controls which is my it is missing in the middle photo. I decided the next colour would be the black which makes up the majority of the body, so I masked off the tank, buffers and cylinder covers (the purple stuff is Humbrol Maskol, which I really should remember to only use with the window open) and sprayed on a couple of layers of satin black. After leaving the paint to dry for an hour or so I gently eased off the tape and maskol and was pretty impressed with how it has turned out; there are a few spots that need touching up but I can live with that. Buying decent masking tape was certainly worth every penny.
Next up will be painting the inside of the cab so I can finally attach the cab to the footplate before spraying the main body colour.
The first step to painting was to dismantle the locomotive to remove the motor and the cylinders etc. I then primed it with a white primer meant for painting cars to provide a good base colour for the later colours.
I'm still treating the cab and body separately until I've painted the cab controls which is my it is missing in the middle photo. I decided the next colour would be the black which makes up the majority of the body, so I masked off the tank, buffers and cylinder covers (the purple stuff is Humbrol Maskol, which I really should remember to only use with the window open) and sprayed on a couple of layers of satin black. After leaving the paint to dry for an hour or so I gently eased off the tape and maskol and was pretty impressed with how it has turned out; there are a few spots that need touching up but I can live with that. Buying decent masking tape was certainly worth every penny.
Next up will be painting the inside of the cab so I can finally attach the cab to the footplate before spraying the main body colour.
Labels:
Brian Madge,
Humbrol,
modelling,
OO9,
Tamiya
Sunday, April 20, 2014
Quarry Hunslet: Now With Brass Knobs On!
So today's job was to fit the final detailing pieces to the locomotive; the handrails. I'd put this off as I had a feeling it might not be particularly easy to get all four handrail knobs in the right place so that the rails are both horizontal and at the same height on both sides of the saddle tank. I wasn't wrong as it's taken me a number of attempts to get it right.I started by looking at a number of photographs and eventually spotted that the knobs were at the same height on the saddle tank as the rivets on the cab front. This made positioning the rear two knobs fairly easy. It also turned out that the 6mm masking tape I had to hand was a perfect fit between the bottom of the tank casting and the rivets. This meant, in theory, that I could lay a piece of tape along the length of the tank to get the right height for the front two knobs. After aligning the tape, I drilled the four holes and test fitted the knobs (these are the short handrail knobs from Eileen's Emporium) and brass wire for the rails themselves. The right hand side (as seen from the front) was pretty much spot on but the left side was terrible; somehow I'd ended up with the hole too far forward and too far down. I filled the hole with some Deluxe Materials Perfect Plastic Putty, waited for it to dry and then drilled a new hole in what I thought was a better spot. I'm not sure how, given how close the two holes were, but this time I was too far back and too far up. So the hole was filled again and then a third hole drilled. This one is much better, although not perfect, but by this point I was running out of casting to drill into so it will do.
I haven't glued the handrail knobs into place as it makes sense to do that after I've painted the tank, which also means I haven't finally trimmed the rails to the right length either, but the video should give you a pretty good sense of how it now looks.
As well as getting it to run further in each direction along the track (just for GB) the eagle eyed amongst you may notice that I've been at the Archer rivet transfers again. the whistle mounting bracket is now riveted to the cab front, if that isn't attention to detail then I don't know what is!
The only things now missing are the things I can't fit until it is painted; the reversing lever (which I can't fit until the cab is fixed in place), the whistle, and name and maker plates, which haven't yet arrived from Narrow Planet. This means the next step is to find a can of primer
Quarry Hunslet: The Best Job In The World!
I'm sure that most of you wanted to be a steam engine driver at some point in your life. I know I did as a small child and my afternoon on the Welshpool and Llanfair Light Railway back in 2011 certainly reinforced how much fun it is. This of course means that we need a driver to enjoy the Quarry Hunslet once it's completed. Fortunately the kit comes with a suitably posed figure.
As with the other whitemetal castings in this kit the driver didn't need much cleanup and a quick blast of grey primer gave a suitable base colour. Painting was done using Model Color acrylics (dark flesh, black, burnt umber, white, flat blue, and scarlet) and then the whole thing was dusted with Humbrol smoke weathering powder before a final blast of matt varnish toned things down even further. Not the best painted miniature I've ever done (I used to paint Warhammer figures, Night Goblins were my favourites) but certainly not the worst. Hopefully he'll enjoy the ride!
Labels:
Brian Madge,
Humbrol,
Model Color,
modelling,
OO9
Quarry Hunslet: Whistle While We Work
As I mentioned in a previous post the loco is essentially built apart from adding a few detailing parts. Last time I said this there were three parts left from the kit as well as some extras I wanted to add. There is now only the reversing lever left to add from the kit which I can't add until the cab is fixed in place. I've added the steps but they weren't really interesting enough to warrant a post of their own.
Just as no steam locomotive would be complete without a proper smoke box door it also wouldn't be complete without a steam whistle, yet the kit doesn't include one. This might be because on all but one photo of Dorothea I can find I can't see a whistle. The only hint of a whistle is in a photo on page 126 of Quarry Hunslets of North Wales by Cliff Thomas (Thanks to Paul for recommending this book). This seems to suggest that the whistle is somewhere towards the rear of the left side cab wall, or possibly sticking through the roof. As I've mentioned before I'm not intending to have an exact replica of Dorothea so not knowing where her whistle was isn't the end of the world. What I've done is look at photos of a number of similar locomotives and here we can see that usually the whistle is mounted on the front of the cab between the two windows, with the steam pipe feeding through the wall into the cab. The main problem I had was working out where to find a suitably sized whistle.
If you remember I discovered, after almost ruining the smokebox door, that detailing parts designed for 4mm scale are usually meant for use on full sized locomotives and not the smaller narrow gauge ones. Fortunately in the comments to that post Paul made a genius suggestion; use parts designed for 3mm scale modelling instead. I thought this ideas was brilliant as all the parts will be essentially 3/4 of the size of the equivalent 4mm scale part and much closer to the size needed for narrow gauge modelling.
A quick internet search led me to the website of 3mm Scale Model Railways who appear to sell almost anything the discerning 3mm scale modeller would need including a varied selection of locomotive detailing parts. Looking down the list we quickly come to part L159 "Loco Whistles, Turned Brass x 2". When the parts arrived yesterday quickly holding one up against the loco and they seemed the perfect size so I set about attaching one to the cab.
As you can see I fabricated a small right angled bracket to hold the whistle in place, which seems to be fairly prototypical. This was made using a piece of the waste from the sheet of etched brass parts. There wasn't much in the way of fancy measuring, and in fact it was filed down a little after folding to better fit. I bent the stem of the whistle by clamping the very end in the hold and fold to get a nice 90 degree bend. I then glued the bracket in place on the cab wall and left the glue to full set. The whistle can then be easily slid into the hole. Currently the whistle isn't glued in place (it's actually being stored in the box with the rest of the kit parts) as I'm only going to finally fit it after painting; given it should be brass it seems silly to paint it rather than leave it as it is.
Just as no steam locomotive would be complete without a proper smoke box door it also wouldn't be complete without a steam whistle, yet the kit doesn't include one. This might be because on all but one photo of Dorothea I can find I can't see a whistle. The only hint of a whistle is in a photo on page 126 of Quarry Hunslets of North Wales by Cliff Thomas (Thanks to Paul for recommending this book). This seems to suggest that the whistle is somewhere towards the rear of the left side cab wall, or possibly sticking through the roof. As I've mentioned before I'm not intending to have an exact replica of Dorothea so not knowing where her whistle was isn't the end of the world. What I've done is look at photos of a number of similar locomotives and here we can see that usually the whistle is mounted on the front of the cab between the two windows, with the steam pipe feeding through the wall into the cab. The main problem I had was working out where to find a suitably sized whistle.
If you remember I discovered, after almost ruining the smokebox door, that detailing parts designed for 4mm scale are usually meant for use on full sized locomotives and not the smaller narrow gauge ones. Fortunately in the comments to that post Paul made a genius suggestion; use parts designed for 3mm scale modelling instead. I thought this ideas was brilliant as all the parts will be essentially 3/4 of the size of the equivalent 4mm scale part and much closer to the size needed for narrow gauge modelling.
A quick internet search led me to the website of 3mm Scale Model Railways who appear to sell almost anything the discerning 3mm scale modeller would need including a varied selection of locomotive detailing parts. Looking down the list we quickly come to part L159 "Loco Whistles, Turned Brass x 2". When the parts arrived yesterday quickly holding one up against the loco and they seemed the perfect size so I set about attaching one to the cab.
As you can see I fabricated a small right angled bracket to hold the whistle in place, which seems to be fairly prototypical. This was made using a piece of the waste from the sheet of etched brass parts. There wasn't much in the way of fancy measuring, and in fact it was filed down a little after folding to better fit. I bent the stem of the whistle by clamping the very end in the hold and fold to get a nice 90 degree bend. I then glued the bracket in place on the cab wall and left the glue to full set. The whistle can then be easily slid into the hole. Currently the whistle isn't glued in place (it's actually being stored in the box with the rest of the kit parts) as I'm only going to finally fit it after painting; given it should be brass it seems silly to paint it rather than leave it as it is.
Friday, April 18, 2014
Quarry Hunslet: Even More Riveting
Having added rivets to the door runners on the rear of the cab I decided I'd do something about the lack of rivets on the front buffer beam using the same approach; resin transfers from Archer.
Having looked at a few photos of both Dorothea (the prototype the kit is based on) and other locos in the same class there doesn't seem to be a common pattern to the rivet placement on the front buffer beam. Not only do the placements of the rivets vary between locos but they also appear to vary slightly over time on the same loco. Having said that in most cases there are rivets across the top of the buffer and at least one line of vertical rivets where the side frame attaches to the buffer, so I've used that as the basis for detailing the model.
Adding these rivets was a little more challenging than doing the door runners. The two sets of vertical rivets were easy as the parallel lines are part of the transfer sheet. The line across the top was a bit more tricky though as essentially I've used one rivet from eleven separate lines on the sheet. This means that there is no real gap between the rivets and the next in line so the piece I had to cut out was very very thin and fragile. In fact it took me three goes to get it right, which is a pity given how expensive the transfers are! I think it was well worth it though as it certainly adds more character to the front of the loco.
Having looked at a few photos of both Dorothea (the prototype the kit is based on) and other locos in the same class there doesn't seem to be a common pattern to the rivet placement on the front buffer beam. Not only do the placements of the rivets vary between locos but they also appear to vary slightly over time on the same loco. Having said that in most cases there are rivets across the top of the buffer and at least one line of vertical rivets where the side frame attaches to the buffer, so I've used that as the basis for detailing the model.
Adding these rivets was a little more challenging than doing the door runners. The two sets of vertical rivets were easy as the parallel lines are part of the transfer sheet. The line across the top was a bit more tricky though as essentially I've used one rivet from eleven separate lines on the sheet. This means that there is no real gap between the rivets and the next in line so the piece I had to cut out was very very thin and fragile. In fact it took me three goes to get it right, which is a pity given how expensive the transfers are! I think it was well worth it though as it certainly adds more character to the front of the loco.
Labels:
Archer,
Brian Madge,
modelling,
OO9
Wednesday, April 16, 2014
Quarry Hunslet: Cab Controls
The next, and almost last, step is to add the detail items to the inside of the cab. There are three nice whitemetal castings for the safety valves, brake, and reversing lever and then some tiny etched parts for the regulator and a couple of valve wheels. I've used a combination of the kit instructions, prototype photos and common sense to fit these.
The vale wheels were very fiddly as they involve first folding a tiny etch in half as the backing and then attaching the wheel; thank goodness for the hold and fold! At least there is no question as to exactly where they fit. The regulator is again quit difficult to make up as it needs short pieces of wire attaching to act as the handle and to attach to the backhead. I've fitted it at an angle which will suit the driver figure that came with the kit (more on him in a later post).
The three whitemetal parts took a bit more thinking and cleaning up before they could be fitted. I intended to fit the safety valves in the same way as the chimney, with a piece of brass wire connecting it to the top of the backhead unfortunately I decided that would be tricky if not impossible. The problem is that the top of the valves have to just poke out of a hole in the roof (so on the real thing the cab didn't fill with steam) and trying to figure out where to drill was impossible. So I checked that it looked as if it would fit and then added a drop of glue to the bottom of the part and nudged it into place with a cocktail stick through the cab door. Amazingly it went on first time.
The brake had a pin on the bottom of the casting that would allow it to go through a hole in the footplate for a secure fit. Unfortunately, as we know from before, the footplate is very difficult to drill through and given how close I needed to get the hole to the side of the firebox I couldn't get the drill upright and to bite. After trying for about five minutes and making no progress I decided to remove the pin and just glue it in place. Given that it glues to the firebox side as well as the footplate it seems secure.
The reversing lever was the most awkward to fit. Looking at photos it should be slightly further forward and to the right. Unfortunately this is about as far forward and right as it will go and still allow the cab to fit, and to achieve this I still had to file down the width of the casting. Anyway they are on and look good enough considering that they will be difficult to see once the cab is on.
With these parts in place I have just three more parts from the kit left to fit (I'm not including the driver as part of the loco); two steps and the reversing rod. There are a few other detailing parts I want to add that weren't part of the kit, but this means I'm getting very close to being able to start painting things, although I'm already beginning to see that deciding on the order to apply the different colours could be an interesting challenge.
The vale wheels were very fiddly as they involve first folding a tiny etch in half as the backing and then attaching the wheel; thank goodness for the hold and fold! At least there is no question as to exactly where they fit. The regulator is again quit difficult to make up as it needs short pieces of wire attaching to act as the handle and to attach to the backhead. I've fitted it at an angle which will suit the driver figure that came with the kit (more on him in a later post).
The three whitemetal parts took a bit more thinking and cleaning up before they could be fitted. I intended to fit the safety valves in the same way as the chimney, with a piece of brass wire connecting it to the top of the backhead unfortunately I decided that would be tricky if not impossible. The problem is that the top of the valves have to just poke out of a hole in the roof (so on the real thing the cab didn't fill with steam) and trying to figure out where to drill was impossible. So I checked that it looked as if it would fit and then added a drop of glue to the bottom of the part and nudged it into place with a cocktail stick through the cab door. Amazingly it went on first time.
The brake had a pin on the bottom of the casting that would allow it to go through a hole in the footplate for a secure fit. Unfortunately, as we know from before, the footplate is very difficult to drill through and given how close I needed to get the hole to the side of the firebox I couldn't get the drill upright and to bite. After trying for about five minutes and making no progress I decided to remove the pin and just glue it in place. Given that it glues to the firebox side as well as the footplate it seems secure.
The reversing lever was the most awkward to fit. Looking at photos it should be slightly further forward and to the right. Unfortunately this is about as far forward and right as it will go and still allow the cab to fit, and to achieve this I still had to file down the width of the casting. Anyway they are on and look good enough considering that they will be difficult to see once the cab is on.
With these parts in place I have just three more parts from the kit left to fit (I'm not including the driver as part of the loco); two steps and the reversing rod. There are a few other detailing parts I want to add that weren't part of the kit, but this means I'm getting very close to being able to start painting things, although I'm already beginning to see that deciding on the order to apply the different colours could be an interesting challenge.
Labels:
Brian Madge,
modelling,
OO9
Tuesday, April 15, 2014
Quarry Hunslet: Riveting
As I pointed out in a recent post there was a slightly problem with fitting the rear cab doors. Essentially the cab wall had nice etched rivet detail that would be completely hidden by the door runners. I did contemplate fitting the doors to the inside of the cab instead, but not only would this not be prototypical I don't think it wuold have looked great either. The only solution then was to file off the etched rivets and add new rivets to the runners.
Given that the runners were made from etched brass it would have been possible to punch new rivet marks into the soft metal, but I decided that doing it well and getting the spacing right might be difficult. Fortunately in the comments on another post the possibility of using resin transfers to add rivets had been raised, and Paul had even recommended a particular transfer sheet. So I ordered Archer's resin transfer sheet number A88025 from their main UK stockist, DCC Supplies, and set about adding the doors.
As you can see this was a three step process. First I had to file off the original rivets to enable the door runner to fit flush against the wall. In the photo you can still see the rivets, but I couldn't feel them and took the decision that was good enough as I didn't want to risk filing away too much material. The next step was to glue the doors and runners in place. In the end one of the doors is on a bit of an angle, but they were fiddly enough to fit as it was so I decided to leave it as it adds character. The final step was to add the new rivets.
The rivets are resin on a transfer film and are applied in the same way as any other transfer; get it wet and slide it off the backing paper and in to place. The only difference to normal transfers is that you apply them before painting rather than after. While it's a shame I had to file off the etched rivets I think the result looks pretty good.
Given that the runners were made from etched brass it would have been possible to punch new rivet marks into the soft metal, but I decided that doing it well and getting the spacing right might be difficult. Fortunately in the comments on another post the possibility of using resin transfers to add rivets had been raised, and Paul had even recommended a particular transfer sheet. So I ordered Archer's resin transfer sheet number A88025 from their main UK stockist, DCC Supplies, and set about adding the doors.
As you can see this was a three step process. First I had to file off the original rivets to enable the door runner to fit flush against the wall. In the photo you can still see the rivets, but I couldn't feel them and took the decision that was good enough as I didn't want to risk filing away too much material. The next step was to glue the doors and runners in place. In the end one of the doors is on a bit of an angle, but they were fiddly enough to fit as it was so I decided to leave it as it adds character. The final step was to add the new rivets.
The rivets are resin on a transfer film and are applied in the same way as any other transfer; get it wet and slide it off the backing paper and in to place. The only difference to normal transfers is that you apply them before painting rather than after. While it's a shame I had to file off the etched rivets I think the result looks pretty good.
Labels:
Archer,
Brian Madge,
DCC Supplies,
modelling,
OO9
Sunday, April 13, 2014
Quarry Hunslet: The Italian Job
So having put the main body of the cab together there are just a few detail parts to add it which revolve around the sliding doors in the rear wall. I'm going to model these doors closed as I'm not intending to have the loco permanently coupled to a coal truck.
According to both the instructions and photos of a number of Quarry Hunslet locomotives, the runners should be attached to the outside wall of the cab. The problem is that if I do that they will completely obscure the rivet detail you can see above the hole. Not only does it seem silly to hide the rivets, but I'm a little worried that the glue won't hold well as the rivets will keep the two pieces slightly apart. I could glue the runners to the inside of the rear wall so that the doors still fill the hole, but this wouldn't be at all prototypical.
I'm guessing the only real solution would be to file off the rivets fit the doors and then use rivet transfers on the runner, but this seems like an awful lot of work so I'm wondering if I've missed something obvious. Does anyone have any suggestions?
According to both the instructions and photos of a number of Quarry Hunslet locomotives, the runners should be attached to the outside wall of the cab. The problem is that if I do that they will completely obscure the rivet detail you can see above the hole. Not only does it seem silly to hide the rivets, but I'm a little worried that the glue won't hold well as the rivets will keep the two pieces slightly apart. I could glue the runners to the inside of the rear wall so that the doors still fill the hole, but this wouldn't be at all prototypical.
I'm guessing the only real solution would be to file off the rivets fit the doors and then use rivet transfers on the runner, but this seems like an awful lot of work so I'm wondering if I've missed something obvious. Does anyone have any suggestions?
Labels:
Brian Madge,
modelling,
OO9
Quarry Hunslet: The Cab
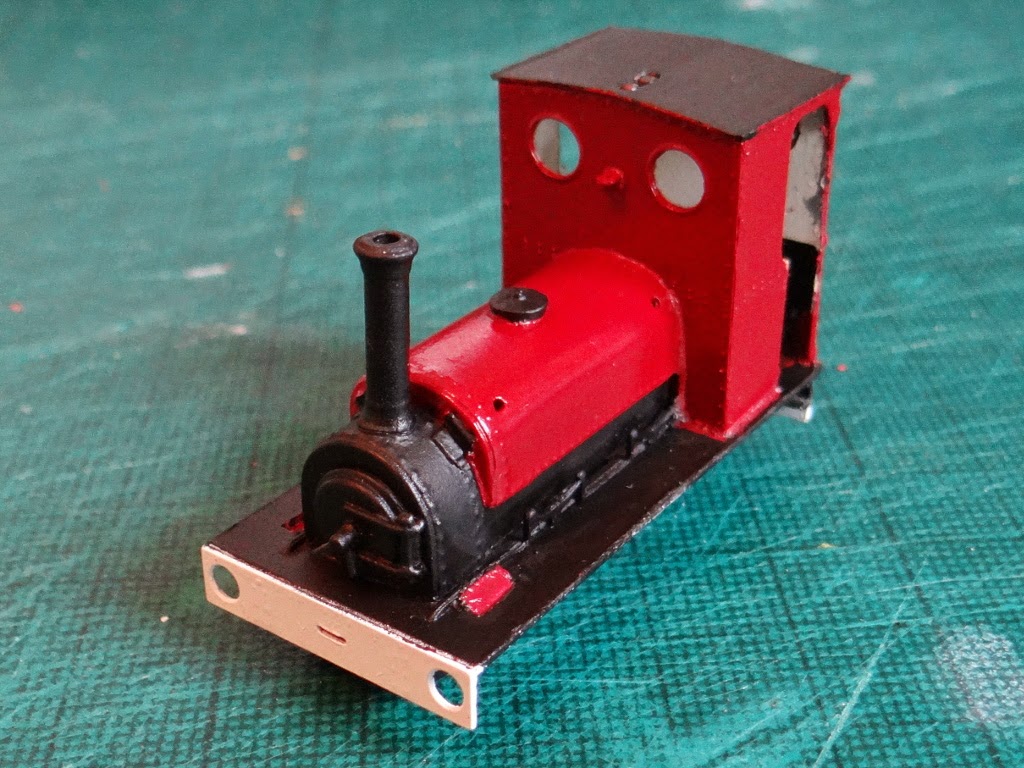
So having a bit of time for modelling today, I've turned my attention to the last major piece of the superstructure; the cab. This is made of 9 pieces of etched brass, and there are two different ways of assembling it. Essentially each wall is made up of two layers. The inner layer is the full thickness of the brass sheet and doesn't have any detailing. The outer layer is half-etched to give rivet detail etc. You can either assemble the four inner layers first or you can assemble the four sides first. I choose to assemble the inner layers and roof first.
In the left hand photo you can see the main walls and roof assembled, the second photo shows the half-etched detail outer layers, and finally you can see the cab resting in place on the footplate. The hardest part was shaping the roof as I don't currently own anything to help me roll the brass. In the end I used the shaft of a screw driver with the brass on my leg to shape it, which worked reasonably well, but I'm going to look into a tool for doing this easier before I build another kit.
There is a little bit of detailing to do before the cab is complete, but that will come in the next post, mostly as I have an excellent title for the post!
In the left hand photo you can see the main walls and roof assembled, the second photo shows the half-etched detail outer layers, and finally you can see the cab resting in place on the footplate. The hardest part was shaping the roof as I don't currently own anything to help me roll the brass. In the end I used the shaft of a screw driver with the brass on my leg to shape it, which worked reasonably well, but I'm going to look into a tool for doing this easier before I build another kit.
There is a little bit of detailing to do before the cab is complete, but that will come in the next post, mostly as I have an excellent title for the post!
Labels:
Brian Madge,
modelling,
OO9
Subscribe to:
Posts (Atom)